Automation is a key component of DevOps that improves the efficiency of your application’s life cycle. Deploying apps manually should not be an option for enterprise grade applications. It’s not uncommon for solutions to have upwards of double digit microservices. If you try to manage the life cycle of all your applications manually, at some point there will be what feels like a good reason to skip the quality constraints – like ignoring tests for code coverage and deploying anyway because of an “urgent issue”. Alternatively, if you have an automated and mature process then this possibility would not exist, and that’s why a pipeline can help guarantee the deliverable’s integrity over the long term.
Continuous Integration and Deploy
The CI and CD process is not only about automation; it’s also about integration. Having a pipeline in place allows you to integrate tools like SonarQube to collect metrics from your code and fail the pipeline in cases where the established metrics aren’t met. In more advanced pipelines, you can deploy your app using ramped, canary or blue-green deployment types. You can also run unit, UI, integration, and load tests using different tools, and rollback your release in case any of the tests fail. It’s an entirely new world, but before all of this, you need to have the base: test, build and deploy.
As any serious developer would – just kidding (maybe not), I’ll use Docker to
containerize the app. I’ll build and deploy a .NET 6.0 API on an Amazon ECS
Cluster Service. I’m going to use an Amazon ECS Cluster with EC2, but if you
prefer using serverless, the steps are exactly the same to deploy on ECS Cluster
with AWS Fargate, except for the steps to create your service and task definition.
Nowadays an ECS cluster already supports running EC2 and Fargate service types
simultaneously. For this sample, I’m assuming you already have your ECS cluster
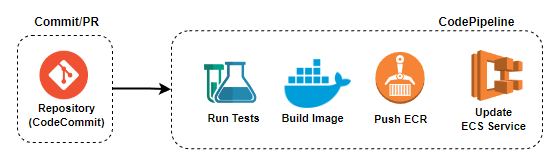
but don’t have an automated deployment. Below are the steps that I’ll implement
in the pipeline:
-
Login on AWS ECR.
-
Run application tests.
-
Build a docker image locally.
-
Push the docker image to ECR.
-
Deploy the application on ECS service.
Starting The Pipeline Creation
Before deploying our application, it’s necessary to have two things: source and target. Source: The code to be built. For AWS CodePipeline, we’ll use AWS CodeCommit as a repository (source) but you can also use any of the other supported source code management tools. Target: The place we want to deploy. For this sample, we’ll use ECS with EC2 as you know, but you can also use an Amazon S3 Bucket (Static Web Site) or AWS Elastic BeanStalk among others. To create the pipeline we need to accomplish four steps: Settings, Source, Build and Deploy. Let’s start from the first – Settings.
During step 1, we are going to define the app name, the role which CodePipeline will use to deploy the app, and the artifact (build output) location – in this case an Amazon S3 Bucket. See my configurations in the screenshot below.
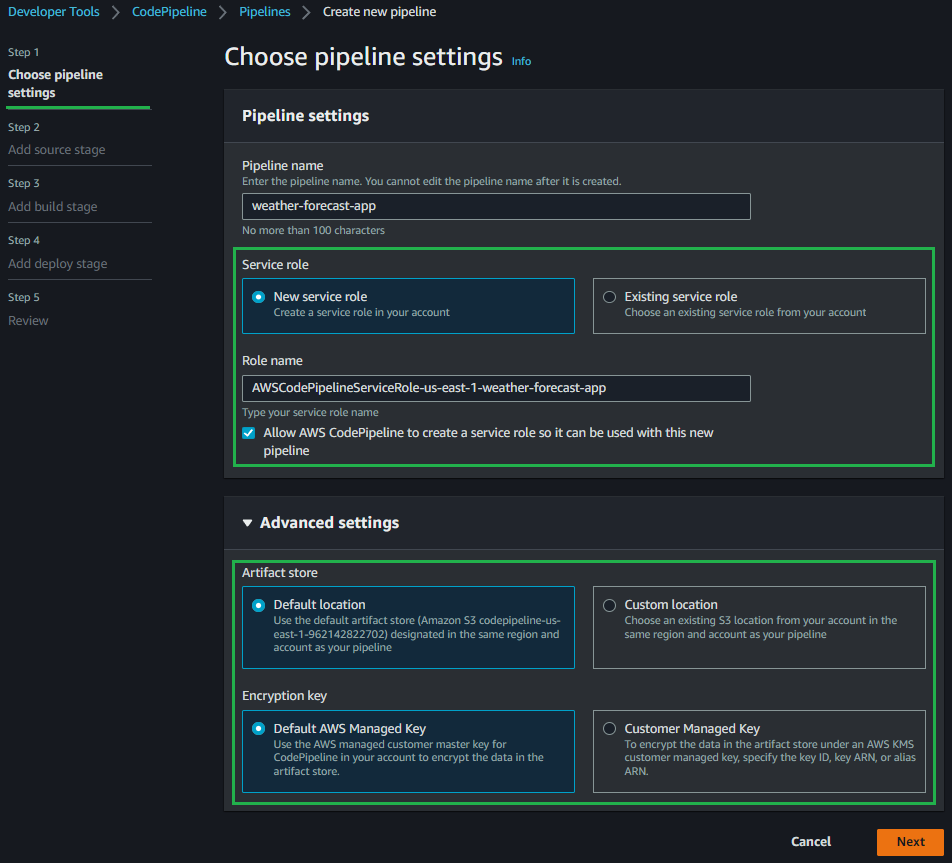
You can see that the service role section is highlighted. It’s important to know that more than one role will be created behind the scenes until the end of the steps – one role for AWS CodePipeline, one for AWS CodeBuild and another for events. In the Advanced Settings section you can see that we will use the Default location (Amazon S3 Bucket) for storing the artifact and a default AWS Managed Key from AWS KMS to encrypt the artifact data.
Source Configuration
The next step in the wizard after Settings is the Source stage. During this step, we are going to define an AWS CodeCommit repository as the Source provider so make sure you have your code uploaded there.

AWS CodePipeline offers multiple options to trigger your pipeline. The polling option will continuously check for events that will trigger your pipeline, which tends to be more expensive compared to triggering your pipeline from a webhook.
Anytime I have the choice, I prefer to be notified instead of polling, that’s why I chose Amazon CloudWatch Events above. Another callout I would like to make is about Branch Name because every time a new commit occurs on the chosen branch, the pipeline will be triggered. Make sure to choose the correct branch according to your branching strategy (development, staging, production).
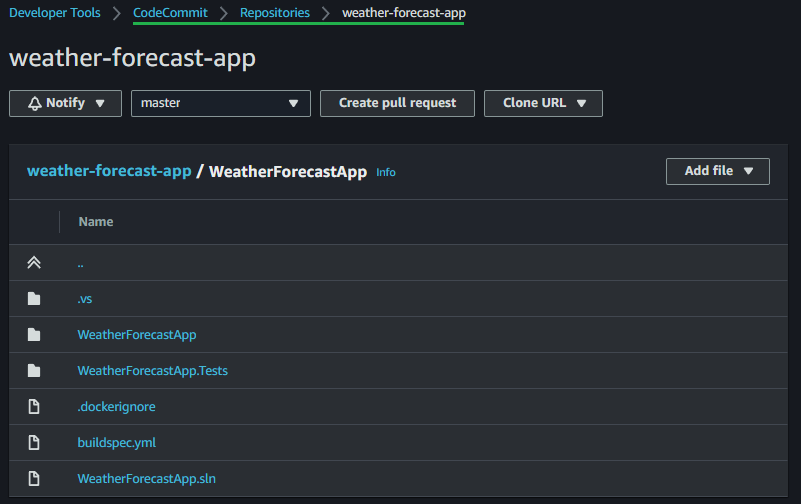
Looking at my code below, you see I am using a simple .NET 6.0 solution with two projects. One project is the API with the default weather forecast controller and the other is a unit test project where I wrote a single test to demonstrate how to run your tests on the pipeline. Also, you may have noticed that we have a buildspec.yml file there which I will talk about soon.
Build Configuration
The third stage of the AWS CodePipeline wizard is the build stage. Here I will set up an AWS CodeBuild as a server to build the .NET project using a custom yaml build specification.
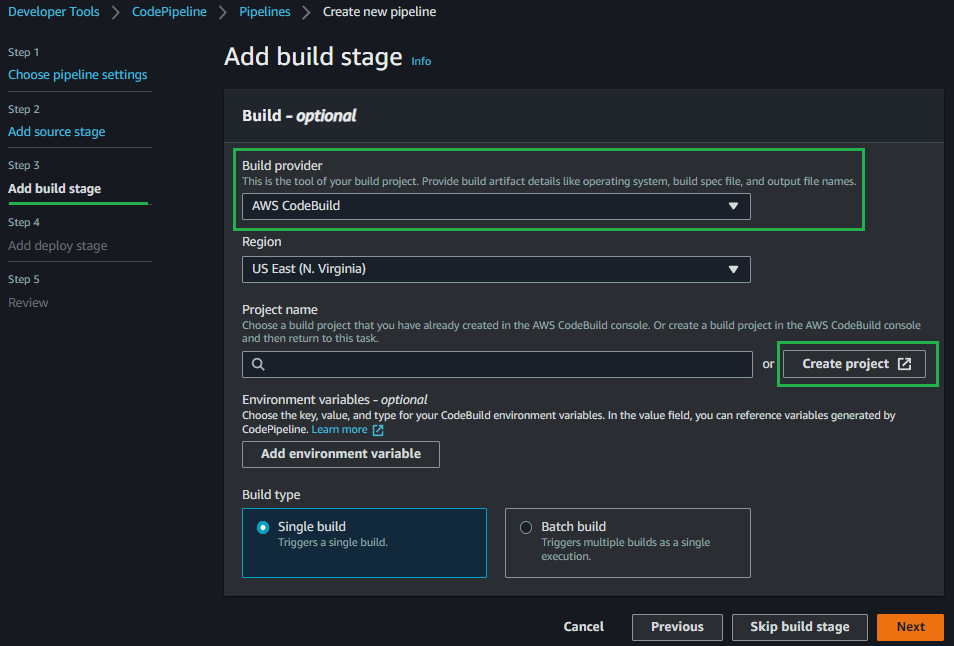
Above you can see that the “Project name” field is empty. This is because we need to create the CodeBuild Project as a separate step. Creating the project separately is where we’ll fill out the build and server specifications (the machine we want to spin up to run the build). Remember to go back to the project name selection box and choose the newly created CodeBuild project.

In the picture above, you can see all the configuration options I selected. There are four main boxes: Project Configuration, Environment, Build Spec and Logs. In the Project Configuration box, enter only the Project name. In the Environment box, configure the operating system that CodeBuild will use to build the project. For this one I selected Standard AWS Linux. As we are working with Docker, we need to enable the “Privileged” flag. In the Build Spec box, enter the path to your build specification yaml. In the Logs box, enable the CloudWatch Logs. Without enabling Amazon CloudWatch Logs, you won’t be able to see any build logs at compilation time.
On the Service role section, select New Service Role and set a name. For this step, we’ll handle permissions for AWS CodeBuild instead of AWS CodePipeline. This automatic role creation is helpful but in this specific case, we need to edit the created role to attach one more existing policy to allow CodeBuild to push the Docker image to the private Amazon Elastic Container Registry (ECR).
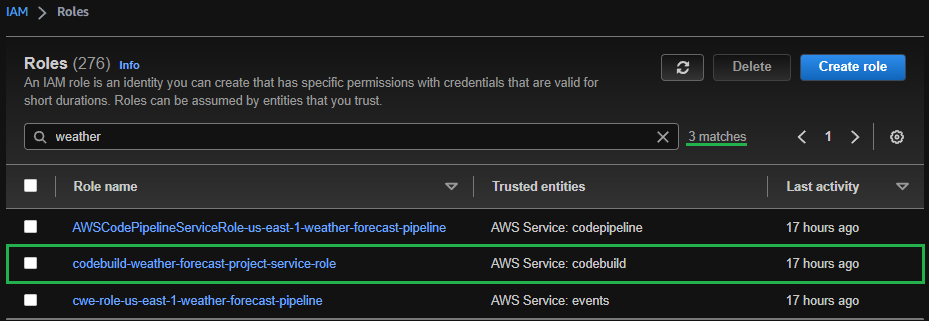
For this step, click on the role codebuild-
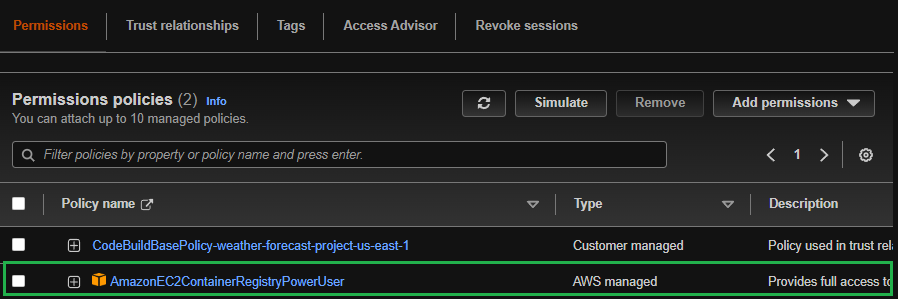
Finally, we need to specify the build configuration. Here, you can see that AWS already provides a CodePipeline template so we are going to start with that and make some minor tweaks. In the build spec below, we have three main sections: pre_build, build and post_build. Under the pre_build, we’ll execute a command to login on ECR and set three variables. Under build, we’ll run the solution tests and make a Docker build and tag (the used Dockerfile, which is also the default). Under post_build, we’ll push the image to an Amazon ECR and also write the image specifications to a file (artifact) that will be used by the Amazon ECS service.
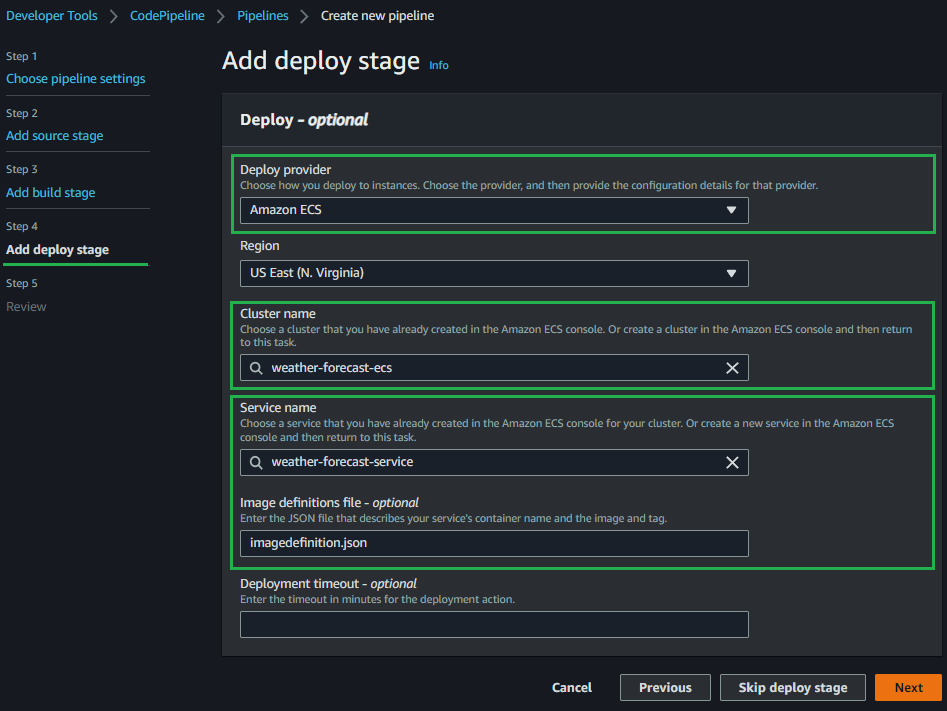
Deploy Configuration
The last step of the configuration wizard is the Deployment phase. Since we are using an Amazon ECS cluster, we need to choose the Amazon ECS option and pick our Cluster and Service name. On the image definitions file field specify the artifact that was created as output from the build.
Following all the above steps, you should have something like:
Testing
f you’re like me and like to validate that things are working as expected, you can access the cluster instances through SSH and run a “docker ps” command to check if the container is running correctly.

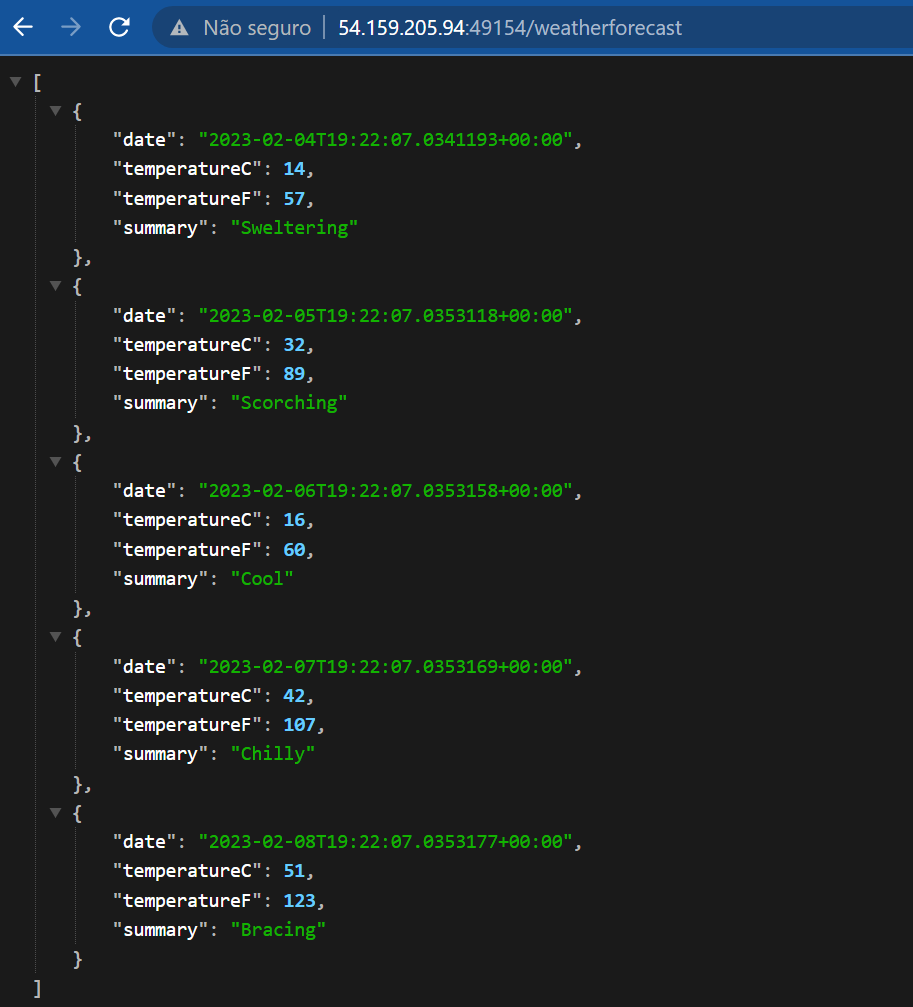
Having the container running is awesome but we also need to check if it is working from the browser. Just pick the public IP from your instance (that you used on the step before) and include the port where the container is running followed by /weatherforecast. Don’t forget to allow TCP traffic on the container port on your security groups.
Disclaimer: We are using an instance hosted on a public subnet only for demonstration purposes – the focus is on the pipeline, but in your production environment you should have instances running on private subnets behind an Application Load Balancer. If you have that, on the step before, instead of getting the public IP of your instance you would get your load balancer DNS.
Conclusion
Hope you have enjoyed this post and learned the first steps to deploy your app using CodePipeline, CodeBuild, CodeCommit on an ECS Cluster Service and have understood how important is to have automation always that you can, it doesn't save only time but also guarantees the execution of a quality process.